If you've ever wanted to learn how to make stained glass projects, you've come to the right page. Here, we explain the steps and materials needed to get started. We've used some of our first projects to illustrate the proper methods. If you're interested in undertaking stained glass as a hobby and are still a little reluctant after reading this page, you may want to start small. If so, check out our page of ornaments and sun catchers.
If you're looking for a new hobby, stained glass may be right for you. It's not difficult, but it takes skill and lots of patience. If you're interested in pursuing stained glass as a hobby, we highly recommend taking a class first. Doing so provides invaluable experience at a fraction of the cost. If you live in or around Nashville and are interested in taking a class, try giving Sam a call at Sam's Stained Glass Accessories. It's important to note that this page offers a very broad discussion of the steps involved. For an overview of the process, read on.
Taking on stained glass as a hobby is a somewhat expensive pursuit. Here's a list of the things you'll need, along with some ballpark prices. All of them can be purchased online.
Other items you'll need include a Sharpie marker, a paintbrush (to apply flux), a bench brush, safety goggles or a face shield for the grinder, horseshoe nails, and glass. Glass is priced per square foot and starts as low as $10 per sheet, but the nicer the glass, the higher the cost.
Before we get started, it's important to note that our discussion here applies to stained glass, which is less expensive and entails a simpler process than leaded glass. However, before you decide on a project, there are some things you need to know. First, copper foil is used to join stained glass. Because copper is very strong, it doesn't have a lot of flexibility. Thus, if you want to make a piece of glass for an interior door, you should know that if the door gets a lot of use or may get slammed, the vibration could cause the glass to crack. Second, stained glass isn't recommended for outdoor use. That's because copper doesn't allow glass to expand and contract, and the glass will crack with extreme temperature changes. With that in mind, your project's ultimate destination should be indoors. With the formalities out of the way, let's get started.
The first thing you'll need is a workspace. A board with a lip works well, particularly for smaller projects, because it allows you to contain all the pieces in one area. Also, when the time comes to solder, you want a surface that you don't mind getting solder on. If you decide to build a board, we recommend MDF (medium-density fiber board), not plywood, which will burn.
An alternative is drywall, which is what we prefer. It handles hot solder well and takes nails easily. (As your project draws to an end, you'll need to hammer nails into the board to secure the glass before soldering it.)
Once you have a workspace, it's time to pick a pattern. After choosing a design, number each space that will contain glass. Additionally, you may want to add a letter to each number to indicate the color of glass the space will contain. There's no method to numbering, but each number should be used only once. For this project, we used some beveled pieces. You can bevel pieces on a grinder, but it requires a special grinding bit. We purchased the beveled pieces for this project. To get an idea of what your template should look like, click here.
Next, place each piece of glass (smooth side up) on top of it's respective spot on the pattern and trace with a marker. Now you're ready to score and cut. To do so, hold the glass cutter at a 90-degree angle to the glass and press firmly. You should hear a ripping sound as you score. For best results, start and end 1/4" from the edge. A good score looks like a hair on the glass when you're finished. Most glass cutters have a metal ball on the end opposite the cutting wheel. After scoring, tap the ball on the underside of the score line to break the glass. For straight edges, you can use running (breaking) pliers to assist in the break. To view a short video on how to use running pliers, click here. Cutting glass successfully takes practice,
so don't worry if the pieces aren't perfect.
Here, you
can see the gaps between each piece. You'll have an opportunity to correct that.
The best way to correct gaps is by grinding. To ensure proper fit, start in a corner and continue to the adjacent piece. To know where and how much to cut, place the first piece on top of the pattern and draw a line on the glass with a marker. In this picture, we started with the bottom corner piece, which is clear. Once it was ground to fit, we taped it to the pattern so it wouldn't move. We then worked on the adjacent piece (the green leaf) and so on. Be sure to tape each piece as you complete it to ensure a uniform fit. For a brief video on how to use a glass grinder, click here.
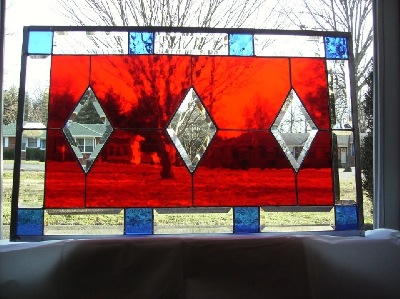
After grinding all the pieces and taping them together, you're ready to foil, which entails taping the foil to the edges and sides of the glass. Without the foil, the solder would have nothing to stick to. If you plan on framing your project, you'll want to avoid foiling the outside edges. In the main pic at the top of the page, we used zinc u-channel came (yes, the metal strip is called came) to frame out our project. If you decide not to frame, then you should foil all the edges. To apply copper foil tape, center it on the edge of the glass and press it onto both the edges and the sides. Once it's applied, use a fid (a Sharpie works great) to press out any air bubbles. The tape should be completely flat when you're finished.
As we mentioned earlier, grinding provides the greatest opportunity to correct any cutting errors. However, don't be surprised if you still have some gaps after foiling. That's OK; the solder will fill them in. You'll notice in this pic that the numbers are still on the glass. Because you'll add flux (which is oily) before soldering, you won't clean your project until it's completely finished. At this point, you're ready to apply flux and start soldering. Note that in the project shown here, the perimeter isn't foiled because we chose to frame it.
Once you have all the pieces exactly where you want them, secure them in place with horseshoe nails (used because they have flat edges). Next, apply flux to all the seams, then tack the pieces together by soldering all connection points. Don't worry if you get solder on the glass. Remember, that's the purpose of the copper foil. Solder doesn't stick to glass and will wipe off easily once it's dry. For a better view, click here.
The next step is tinning, which entails running a thin line of solder across all seams. Your iron should be held flat during this process, the purpose of which is to join all the pieces together and fill any gaps. Don't overdo it with the solder. Drop a bead, drag it as far as you can, then drop another. The result should be a thin, flat line. You can use 50/50 or 60/40 solder, the difference being that 60/40 takes more heat to melt. Keep the nails in place until you finish the tinning process.
You're almost done! After tinning, you're ready to run a bead. To start, melt droplets of solder every inch or so along all the seams. To connect the beads and create a raised outline around each piece, drag the iron very slowly, using the side of the iron tip to melt and join the beads into a solid line. If you move the iron too quickly, the beads won't melt and the outline will be wavy instead of rounded and smooth. Once you're happy with the look, flip your project over and repeat the tinning and beading process on the other side.
If you decide not to frame your project, all that's left to do is tin the outer edges; otherwise, cut and attach came strips to the perimeter. To
secure the came, apply solder to all the contact points. Wash both sides
with dish detergent and dry.
If you choose, you can color the solder on your project. The process involves wiping a colored liquid over the entire piece and then washing. The picture on the left has no finish, while the one on the right has a black patina. To enlarge, click here.
Like most crafts, the beautiful thing about stained glass is there is that you're limited only by your imagination. Working with small pieces certainly has its challenges, but it also allows you an opportunity to experiment. You can make anything, including ornaments and sun catchers, which make great gifts.


 If you're looking for a new hobby, stained glass may be right for you. It's not difficult, but it takes skill and lots of patience. If you're interested in pursuing stained glass as a hobby, we highly recommend taking a class first. Doing so provides invaluable experience at a fraction of the cost. If you live in or around Nashville and are interested in taking a class, try giving Sam a call at
 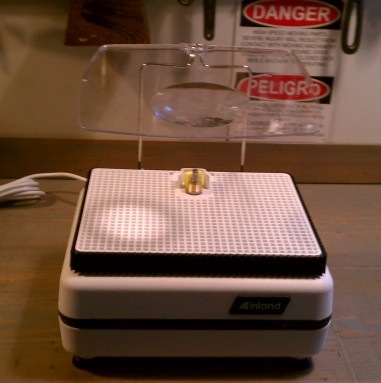 Taking on stained glass as a hobby is a somewhat expensive pursuit. Here's a list of the things you'll need, along with some ballpark prices. All of them can be purchased online.
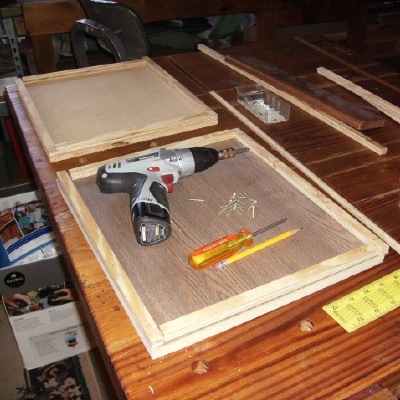 The first thing you'll need is a workspace. A board with a lip works well, particularly for smaller projects, because it allows you to contain all the pieces in one area. Also, when the time comes to solder, you want a surface that you don't mind getting solder on. If you decide to build a board, we recommend MDF (medium-density fiber board), not plywood, which will burn.
 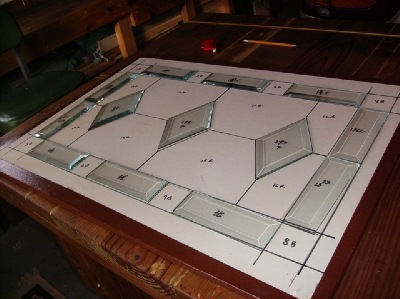 Once you have a workspace, it's time to pick a pattern. After choosing a design, number each space that will contain glass. Additionally, you may want to add a letter to each number to indicate the color of glass the space will contain. There's no method to numbering, but each number should be used only once. For this project, we used some beveled pieces. You can bevel pieces on a grinder, but it requires a special grinding bit. We purchased the beveled pieces for this project. To get an idea of what your template should look like, click
 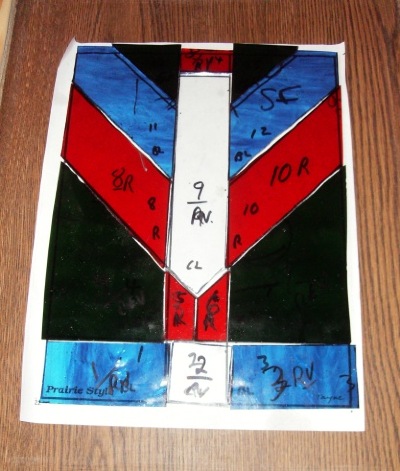 Next, place each piece of glass (smooth side up) on top of it's respective spot on the pattern and trace with a marker. Now you're ready to score and cut. To do so, hold the glass cutter at a 90-degree angle to the glass and press firmly. You should hear a ripping sound as you score. For best results, start and end 1/4" from the edge. A good score looks like a hair on the glass when you're finished. Most glass cutters have a metal ball on the end opposite the cutting wheel. After scoring, tap the ball on the underside of the score line to break the glass. For straight edges, you can use running (breaking) pliers to assist in the break. To view a short video on how to use running pliers, click
 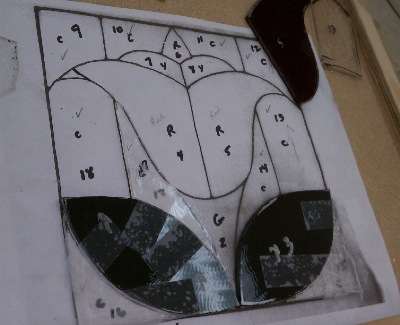 The best way to correct gaps is by grinding. To ensure proper fit, start in a corner and continue to the adjacent piece. To know where and how much to cut, place the first piece on top of the pattern and draw a line on the glass with a marker. In this picture, we started with the bottom corner piece, which is clear. Once it was ground to fit, we taped it to the pattern so it wouldn't move. We then worked on the adjacent piece (the green leaf) and so on. Be sure to tape each piece as you complete it to ensure a uniform fit. For a brief video on how to use a glass grinder, click
 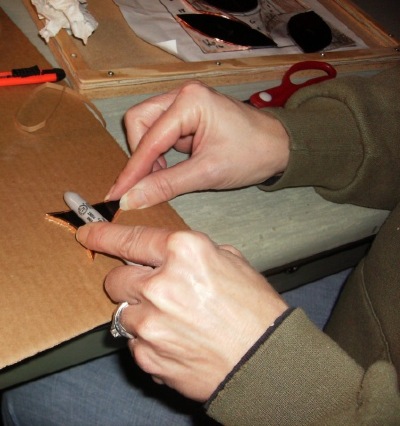 After grinding all the pieces and taping them together, you're ready to foil, which entails taping the foil to the edges and sides of the glass. Without the foil, the solder would have nothing to stick to. If you plan on framing your project, you'll want to avoid foiling the outside edges. In the main pic at the top of the page, we used zinc u-channel came (yes, the metal strip is called came) to frame out our project. If you decide not to frame, then you should foil all the edges. To apply copper foil tape, center it on the edge of the glass and press it onto both the edges and the sides. Once it's applied, use a fid (a Sharpie works great) to press out any air bubbles. The tape should be completely flat when you're finished.
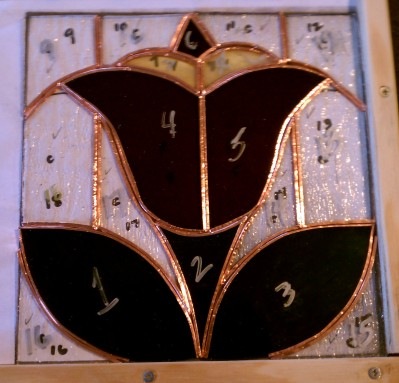 As we mentioned earlier, grinding provides the greatest opportunity to correct any cutting errors. However, don't be surprised if you still have some gaps after foiling. That's OK; the solder will fill them in. You'll notice in this pic that the numbers are still on the glass. Because you'll add flux (which is oily) before soldering, you won't clean your project until it's completely finished. At this point, you're ready to apply flux and start soldering. Note that in the project shown here, the perimeter isn't foiled because we chose to frame it.
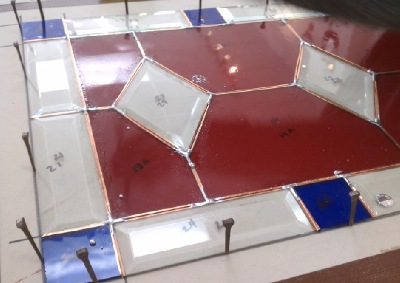 Once you have all the pieces exactly where you want them, secure them in place with horseshoe nails (used because they have flat edges). Next, apply flux to all the seams, then tack the pieces together by soldering all connection points. Don't worry if you get solder on the glass. Remember, that's the purpose of the copper foil. Solder doesn't stick to glass and will wipe off easily once it's dry. For a better view, click
 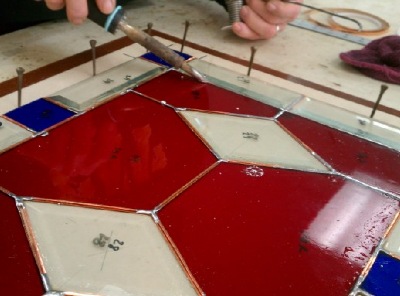 The next step is tinning, which entails running a thin line of solder across all seams. Your iron should be held flat during this process, the purpose of which is to join all the pieces together and fill any gaps. Don't overdo it with the solder. Drop a bead, drag it as far as you can, then drop another. The result should be a thin, flat line. You can use 50/50 or 60/40 solder, the difference being that 60/40 takes more heat to melt. Keep the nails in place until you finish the tinning process.
 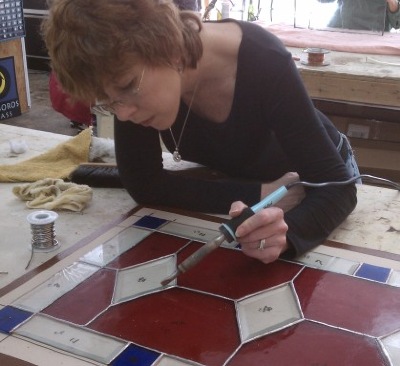 You're almost done! After tinning, you're ready to run a bead. To start, melt droplets of solder every inch or so along all the seams. To connect the beads and create a raised outline around each piece, drag the iron very slowly, using the side of the iron tip to melt and join the beads into a solid line. If you move the iron too quickly, the beads won't melt and the outline will be wavy instead of rounded and smooth. Once you're happy with the look, flip your project over and repeat the tinning and beading process on the other side.
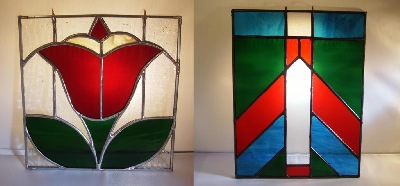 If you choose, you can color the solder on your project. The process involves wiping a colored liquid over the entire piece and then washing. The picture on the left has no finish, while the one on the right has a black patina. To enlarge, click