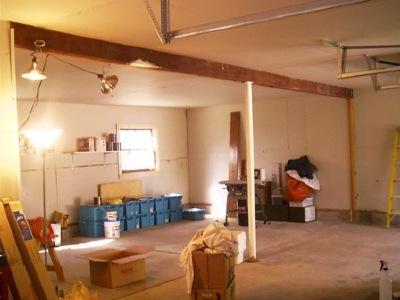
It's hard to believe this is what our garage looked like when we moved in. Neighbors tell us the former owner built it in two weekends. Previously, only a carport stood in the space. The seller asked us if we wanted him to mud and tape, but we told him no. We knew the first time we saw it that we were going to gut it. Of course, we had no idea what awaited us once the drywall came down. In fact, we were pretty fixated on what can only be summed up in four words: worstdrywalljobever. To enlarge the pic shown, click here.
This garage was a top priority for us. After all, it was a major factor in us purchasing the home. We moved in at the end of August and began work in October. As always, Ron did an excellent job projecting our needs for this massive undertaking. We would spend a large part of the winter months razing and rebuilding this 920-square-foot garage, working weekends only. Fortunately, Ron's oldest son Jared was able to drive down and help us during the demolition. In fact, he was able to help out until we got the ceiling up. Note to all future renovators: Never turn down good help.
First, we took down the old drywall. It was then that the former owner's poor workmanship became painfully obvious. Check out the inconsistencies in the studs; it appears they were erected with little logic. Ron added boards to facilitate the hanging of the new drywall. However, on several occasions, having "before" pics to reference was extremely helpful. Also, note the main support beam. Initially, it consisted of three 2"x10" boards. Ron added another board, gaining additional support by anchoring the new board to the adjacent wall. To enlarge the pic shown, click here.
There were so many things we didn't understand about this garage, the main thing being that one of the walls had no windows, yet a spare window was left behind in the shed. Installing the window was a no-brainer, and Ron quickly got to work.
After the hole was cut, we assessed our electrical needs and added seven more outlets. Dad was kind enough to stop by to help. We then took care of some interior caulking, added nailers for the new window and installed insulation and a vapor barrier. Finally, we were ready to hang the first piece of drywall. To enlarge the pic shown, click here.
Don't have a drywall jack? No problem. Just stop by your local home improvement store. They'll be glad to rent you one. To enlarge the pic shown, click here.
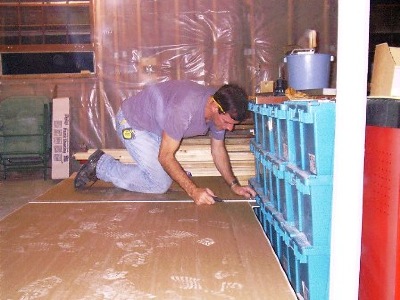
The three of us cranked out the ceiling in under a weekend. Of course, the secret to our success was having a system and staying in sync. Specifically, Ron would assist Jared and me in getting a piece of drywall in place. As we secured it to the ceiling, he would measure the next piece, score it accordingly, and cut it. While he did that, Jared and I screwed in the suspended piece of sheetrock. It was a thing of beauty, and we kicked butt.
Ron and I were left to hang the walls on our own. This pic shows our progress. To this point, we had gutted the walls down to the studs, added a window, insulated, reinforced the support beam, added seven electrical outlets, hung drywall, and taped and mudded. I was finally beginning to see the vision that Ron had all along. I'll say this: If you've never mudded, it's a skill.
Here, the garage is finally starting to take shape. The ceiling and walls have been painted, and the windows have been trimmed out. Three bare bulbs hang as the main lighting.
Until now, we've mentioned little about the floor. There were lots of stains, including oil, and many cracks had to be filled. Ron opted to use a gray epoxy coating to cover the floor. That required applying a cleaning agent, then rinsing it using a power washer. A thorough cleaning ensures better adhesion of the epoxy. We also applied DryLok concrete paint to the perimeter. We had noticed during heavy rain that the perimeter had a tendency to wick water. Applying DryLok was a precautionary measure to help prevent mold.
For some reason, there was a raised L-shaped run of cinder blocks in the middle of the floor. Ron painstakingly removed them with a chisel and lots of elbow grease. We left another affixed cinder block against the back wall. We planned to put in a workbench and figured we could work around it.
Months after getting the garage finished (but still months before we found the lighting we were looking for), we were lucky enough to run across some slatwall. We had since put in a workbench, which we intended to stain gray, so it was a no-brainer when we ran across a batch of gray slatwall for $70 at a building material reclamation outlet. Ron's youngest son Justin assisted in getting it cut and hung.
As luck would have it, the deli that was downstairs from where I worked was going out of business. Seeing as how we needed lights and the deli had lights it no longer needed, I approached the owner. For a mere $5 a piece (I was prepared to pay $10), we were able to furnish the lighting in our new garage. That's a whopping $25. Of course, as usual, they didn't look like this when we found them. It took a few alterations by Ron to make them functional for our space. To enlarge the pic shown, click here.
As you might suspect, our garage is a work in progress. As such, when the opportunity presented itself, Ron built this buffing and grinding station, complete with a sheet of aluminum flashing to catch excess buffing compound.
The grinding station is yet another extension of the workbench. Before adding it, Ron built a table for his miter saw. The grinding station is an extension of the miter saw table.
This is our garage as it stands today (complete with chin-up bar). Of course, it's always evolving, but what fun would it be if it weren't? To enlarge the pic shown, click here.


 It's hard to believe this is what our garage looked like when we moved in. Neighbors tell us the former owner built it in two weekends. Previously, only a carport stood in the space. The seller asked us if we wanted him to mud and tape, but we told him no. We knew the first time we saw it that we were going to gut it. Of course, we had no idea what awaited us once the drywall came down. In fact, we were pretty fixated on what can only be summed up in four words:
 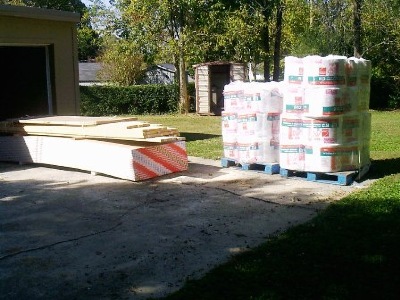 This garage was a top priority for us. After all, it was a major factor in us purchasing the home. We moved in at the end of August and began work in October. As always, Ron did an excellent job projecting our needs for this massive undertaking. We would spend a large part of the winter months razing and rebuilding this 920-square-foot garage, working weekends only. Fortunately, Ron's oldest son Jared was able to drive down and help us during the demolition. In fact, he was able to help out until we got the ceiling up. Note to all future renovators: Never turn down good help.
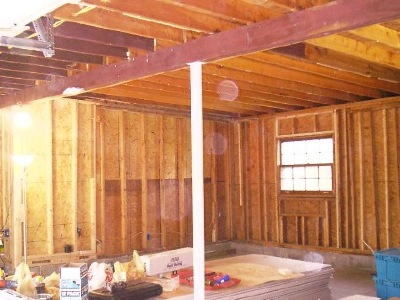 First, we took down the old drywall. It was then that the former owner's poor workmanship became painfully obvious. Check out the inconsistencies in the studs; it appears they were erected with little logic. Ron added boards to facilitate the hanging of the new drywall. However, on several occasions, having "before" pics to reference was extremely helpful. Also, note the main support beam. Initially, it consisted of three 2"x10" boards. Ron added another board, gaining additional support by anchoring the new board to the adjacent wall. To enlarge the pic shown, click
  There were so many things we didn't understand about this garage, the main thing being that one of the walls had no windows, yet a spare window was left behind in the
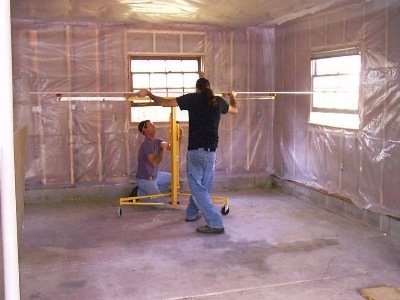
 The three of us cranked out the ceiling in under a weekend. Of course, the secret to our success was having a system and staying in sync. Specifically, Ron would assist Jared and me in getting a piece of drywall in place. As we secured it to the ceiling, he would measure the next piece,
 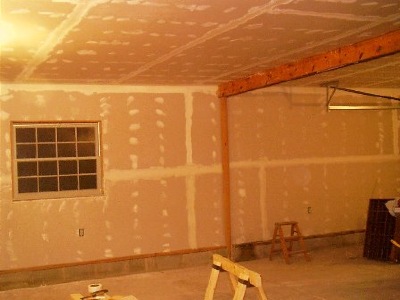 Ron and I were left to hang the walls on our own. This pic shows our progress. To this point, we had gutted the walls down to the studs, added a window, insulated, reinforced the support beam, added seven electrical outlets, hung drywall, and taped and mudded. I was finally beginning to see the vision that Ron had all along. I'll say this: If you've never mudded, it's a skill.
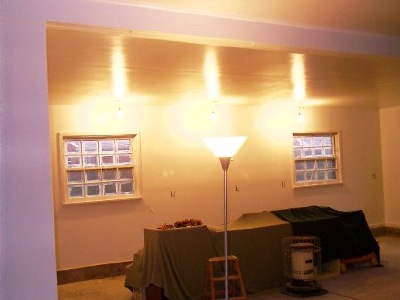 Here, the garage is finally starting to take shape. The ceiling and walls have been
 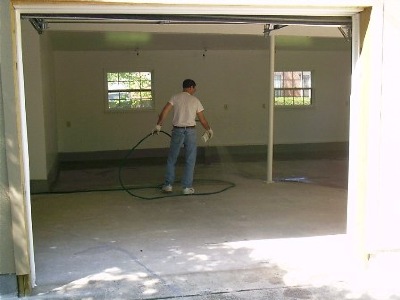 Until now, we've mentioned little about the floor. There were lots of
 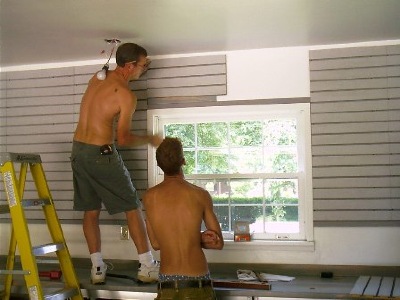 Months after getting the garage finished (but still months before we found the lighting we were looking for), we were lucky enough to run across some slatwall. We had since put in a
 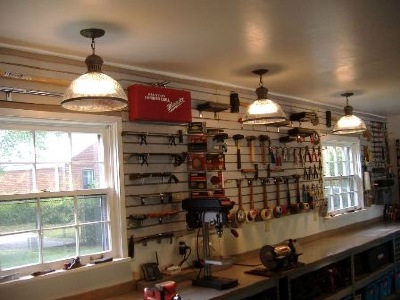 As luck would have it, the deli that was downstairs from where I worked was going out of business. Seeing as how we needed lights and the deli had lights it no longer needed, I approached the owner. For a mere $5 a piece (I was prepared to pay $10), we were able to furnish the lighting in our new garage. That's a whopping $25. Of course, as usual, they didn't look like this when we found them. It took a few
 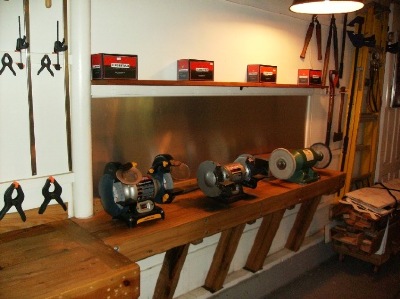 As you might suspect, our garage is a work in progress. As such, when the opportunity presented itself, Ron built this buffing and grinding station, complete with a sheet of aluminum flashing to catch excess buffing compound.
 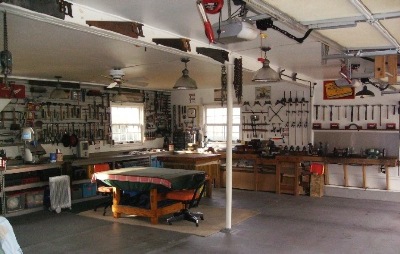 This is our garage as it stands today (complete with